Sunday, March 29, 2015

Chocolate Sour Cream Frosting

Cupcakes With Chocolate Sour Cream Frosting
I usually only make two kinds of chocolate frosting/icing:
1. Butter Cream  with melted unsweetened chocolate added
2. Texas cake icing, made in a saucepan with cocoa for the chocolate flavor.

Perpetual efforts to avoid sugar/weight gain keep me from making cake very often, even to the point of usually buying birthday cakes from the store, but it was the evening before my husband's birthday and I had some complications to my day and didn't get out and shop, so I decided to make cupcakes with a french vanilla cake mix I had in the pantry. I didn't have a can of frosting because I don't like canned frosting, not even a little bit, and they don't put enough in the can to fully  frost a cake, and frosting is easy to make and so much tastier, I would rather do my own.

However, I was out of unsweetened chocolate, and I wanted a butter cream texture to pile on to the cupcakes, so I looked for something I could make with chocolate chips, which I make sure to never run out of. (Is there a Chocoholics anonymous?)  Even though I wasn't sure about a saucepan frosting being thick enough, I decided to take a chance on this recipe from the red and white 1981 Better Homes and Gardens cook book. It turned out fantastic!

When I make butter cream I often use yogurt in place of cream because I like the play of the sweetness and chocolate with the little bit of  sour cream type taste the yogurt adds. This frosting has the same delicious combination of flavors.

This recipe says it frosts two 8 or 9 inch layers. It was perfect for 24 cupcakes, but I might increase it by a third for a layer cake. I will provide those variations since I did make the batch larger just in case and ended up having some left over. It was after midnight when I made it and only the late hour and my dedication to my weight loss coaching group kept me from sitting down with a spoon and eating the leftovers.... Hubby had to have one immediately-after all it had officially been his birthday for 20 whole minutes, and he seemed to like it OK....

Chocolate Sour Cream Frosting-original recipe
Frosting becomes stiffer when refrigerated
 One 6 ounce package (1 cup) semisweet chocolate pieces.
1/4 cup butter or margarine
1/2 cup dairy sour cream
1/4 tsp salt
1 teaspoon Vanilla
2 1/2 cups sifted powdered sugar
In a sauce pan melt chocolate and butter over low heat, stirring frequently. Cool about 10 minutes. Stir in sour cream, vanilla, and salt. Gradually add powdered sugar, beating by hand till smooth and of spreading consistency. Store in refrigerator

Variations and Tips
To make a larger batch:
8 oz chocolate chips
6 tablespoons butter (I don't use margarine-butter tastes and keeps better)
3/4 cup sour cream (My favorite sour cream is Tllamook natural, which has less additives)
3-3 1/2 cups powdered sugar, adding the extra gradually to get the texture you want.

-I was a little short on the sour cream and filled in with Plain Greek Yogurt. Yogurt will lower the fat content and Greek yogurt has less water in it, so it is closer to the texture of sour cream. You might be able to experiment with using all Greek yogurt in this recipe. I don't like most Greek yogurt and am not sure how different brands would affect the taste, so I recommend Tillamook brand which is much milder and more pleasant tasting.

-If you are cutting fat you cold also try using lower fat sour cream

-I used a two quart saucepan and beat in the sugar with a good wire whisk. You could put it all in a mixer, but that would make more dishes to wash. Hand whisking was easy and the frosting turned out perfect! Just be sure to get around the edges of the bottom of the pan so it is all mixed evenly. I'm sure you cold mix with a spoon too, but I think the whisk gets out lumps better and also you then have the frosting covered wires that need licking...

-I didn't sift the sugar and the wire whisk created a smooth, lump free texture with very little extra effort.

-I like to take a bowl or pan that needs that kind of stirring to my kitchen table because the height is more comfortable and the beating is more effective and efficient when the mixture is lower to my body than counter height, so my elbows aren't very bent, so experiment to see what height works best for you!  I'd say the whole beating part took less than two minutes. I was able to make the frosting start to finish in about 15-20 minutes.


Monday, March 23, 2015

Master Smoothie Recipe

I've been making this smoothie most days for several weeks now and thought it would be worth sharing. The basic recipe comes from Reader's Digest 21 day Tummy book designed for people who have digestive problems as well as for weight loss. Since it is concerned with digestive issues, it uses Greek yogurt and no milk. I don't have a problem with dairy so I do vary it some by adding some milk sometimes. 

Not my own photo, but this is how my smoothie looks....
Smoothie Master Recipe
6 ounces nonfat plain Greek yogurt -I like Tillamook Greek yogurt the best. It is much more mild tasting than other Greek yogurts. For easy clean up measuring, put the blender on your kitchen scale and zero the display then spoon in the yogurt until it weighs 6 ounces.

2 Tablespoons light Coconut Milk- This really is optional, but it adds flavor and is good for keeping you satisfied longer, and is good for your gut bacteria, stabilizes blood sugar and is anti-immflamitory.  I get a small can and put the contents in a pint jar in the fridge.

1-2 tablespoons water- (frozen fruit requires more water than fresh)

1 teaspoon real maple syrup- Expensive, but I keep a bottle for only my use and a teaspoon at a time doesn't use it up too fast. Costco is a good source. If not, use honey or even sugar. 1 tsp is only 14 calories.

4-6 ice Cubes-

Add One each from the following categories:

Fruit: For  sweetness, flavor, fiber and nutrition
1 Banana            1 cup strawberries           1 orange, peeled, and removed from membranes
2 kiwis              3/4 cup blueberries         3/4 Cup raspberries          20 red grapes
1/2 cup cubed papaya                1/2 cup pineapple chunks

For fat loss boosting magnesium and fiber:
1 Tablespoon:
Chia seeds
Flax seeds or ground flax (If your blender is not too wonderful use the ground flax)
Pumpkin seeds

Belly fat loss boosting Monounsaturated fat source:
1 teaspoon peanut or almond butter

Flavoring: One or more to suit your taste-
1 teaspoon unsweetened cocoa
1/2 teaspoon Vanilla Extract
1/4 teaspoon cinnamon
1/4 teaspoon powdered ginger or 1 teaspoon fresh grated or minced.

Calories for the typical shake following this recipe: 281 with 20 grams protein, 8.5 grams fat, 9 grams fiber, 35 grams carbohydrates, 59 mg magnesium

Notes: 
I have a really good blender, a Blendtec. I use the pre-programed smoothie setting and it produces a perfectly blended smooth drink with the flax seeds in flecks I can hardly notice. If I were using a regular blender I would get ground flax seed. Keep it in a glass jar in the fridge or freezer since it goes rancid quickly. Chia seeds will probably add a little more body to the smoothie.

I usually make a banana smoothie because it is sweeter, and I like the flavor. I don't like the seeds you get if you use raspberries or blackberries, but the flavor with berries is really good. I do better with blueberries.  I want to try oranges, but the directions say to remove it from the membranes, and I'm not sure if that means each section needs to be taken apart. If so, that is too much work for me! I'll try it eventually and see how it turns out just dropping in the sections after peeling. I think the creamsicle flavor would be really good.

My Variations:
I have whey powder I bought from Costco. It is high in protein but very low in carbs, but even so it adds enough sweetness and flavor to make the difference for me between gag it down and slurp it up. It is expensive, but it's a big bag and lasts quite awhile, and stays good for a long time. I chose CytoSport 100% Whey Vanilla. You really have to read ingredients with whey powders so you don't get one with a lot of sugar in it. This one smells and tastes fantastic. A full serving has 140 calories. When I use it I cut the Greek yogurt in half (3 ounces) and use half a scoop of protein powder. That way I still get the probiortics in the yogurt and still get lots of protein and no extra sugars. A full scoop only has three grams Carbs, but it is amazing what a difference it makes in adding flavor and sweetness 

I also often start by adding 4 ounces of 1% milk, which adds 50 calories. Since the smoothie is my whole breakfast, I don't worry about that much extra calories. When I use milk I leave out the water.

The peanut butter flavor is good with banana, but 1 teaspoon is not very detectable. Still, it is very high calorie, so I watch how much I use.

Sunday, February 8, 2015

Organizing Photo Scans for Family History

11 LMW photo page

I've been scanning photos and documents for Family History preservation.  Right away I realized I needed to organize the photos so that I can find the ones I need when I need them and so that others can make sense of the files as well. 
I know others are interested in scanning also, and thought I would share some information about how I scan and save my scanned files. 

I scan photos and documents with my HP Officejet Pro 8600 Printer/copier/scanner. When I'm scanning everyday items that don't need to be saved long term or don't have archival value to me, I use a lower resolution, but for scanning family photos and documents to archive and share I scan at a high resolution. 600 to 1200 dpi (dots per inch) seems to be a good balance between quality and the time the scanner takes to do the scan. 

I select 'Save as JPEG' in the settings menu when setting up the scan. Then when the preview is done and I'm ready to start the scan I can either save it as a JPEG file or I can click on the drop down arrow where it says 'Save as type' and choose 'Tif' This will save a larger file, but it doesn't alter when opened and closed multiple times so that I have a pristine scan to go back to at any time. When I save it I include 'tif' in the photo title.

 Then I do the scan again and save it with the 'save as type' JPEG. Then later if I do crops and fixes in Photoshop Elements, when I save them I choose the option 'Save As' and add a dash and a modifier so I know what that version is. I use c for crop, f for a photo I've done corrections on, like lighting or color, or fixing flaws. If I save versions I will add a number like c-1, c-2, for different versions. I almost never choose 'save' because that will erase the original and substitute the changed version. 

When you save a scan you have the option to name the image. This is where you need to figure out how you want to organize the photos. Folders in windows organize files numerically first and then alphabetically. I found out if I just typed a description of the photo they would get stored in a mixed up order. That's ok if sequence doesn't matter, but usually with photos you want some kind of time order to the photos. You can just number the photos and add descriptors after the numbers if you want them. That can get into some high numbers, but that's ok. I mainly do that if I'm uploading into an online album so the photos stay in the order I want them.
11 LMW APW 3 Store

11 LMW APW buggy 1900

11 LMW Enterprise 24th

11 LMW Group Photo

When I'm scanning mom's photo albums I do something more complicated. I know I'm likely to share the photos in any number of online ways, such as Facebook, a family history site, a family website or page, or in creating a photo book. I want to be able to look at the name of the photo and know where and when it is from. For example, when I scanned my Grandpa Winsor's Book of Remembrance, I gave each photo a number that corresponded with the page in the book. Then I typed LMW to indicate it was from Luther Murkins Winsor. Then I added a description of what the photo was. For example, 11 LMW Photo page. Because I also took the images of the pages and cropped out images of the individual photos I would then title the photos, such as 11 LMW Sara A Terry and Sister Mary Ann Huntsman. See the photos above for examples of the photos cropped from the page shown at the beginning.

I save all the photos from one album to their own folder. If there are a lot I may put them further into folders by year.  I have a folder titled 'Family History Scans' that all the individual folders are stored in.
1 album page

1-1 Robert Wixom & Rover Freedom Wyoming 1939

1-2 Olive Wixom & Laura Draney 1939 fix

1-2 Olive Wixom & Laura Draney 1939

1-3 EArl P Wixom Freedom Wyoming 1939

For my mom's album that I'm currently doing, I scan the entire page and then the individual photos. If I can't get them off the page without damaging them I crop them out using Photoshop. So I would name them like this. 1 album page, 1-1 Robert Wixom & Rover Freedom Wyoming 1939, 1-2 Olive Wixom & Laura Draney 1939-f, 1-2 Olive Wixom & Laura Draney 1939, 1-3 Earl P Wixom Freedom Wyoming 1939....and so on numbering each photo after the page number and adding as much description as I can from the photo back or the album page. If there is too much description I use a word document and list the photo description and add the additional information and save that in the same folder. 

For another album I used the year to identify each photo and then a number to indicate each photo in that year. Those albums were falling apart and I was redoing them onto archival paper in scrapbooking albums so I didn't feel like the page number mattered.

So now I can mix the photos in an online album and know where to go on my hard drive to find the originals to share with someone or get more information. If I can, I like to have the people's names, the date and place saved in the photo title, but if not, at least the year and a sequential number to keep them in order help a lot when I'm searching through the folders for particular photos. 

After I started organizing my scan projects this way I read a tutorial by a professional who scans for family history and found he was doing much the same thing as what I'd worked out for myself. The important thing is to have a system, use folders and not just give your photos random descriptive titles that leave them in an alphabetical jumble.

When you look at the reasons why we scan, it seems important that each scan be of as high a quality as we can reasonably make, saved in an organized way so we can find, understand and use the photos for ourselves and others, and backed up to keep the work safe. Additionally, there is nothing worse than photos where no one can identify the people, the place or the date. Including as much as possible with the photo to identify it is also essential to archiving and sharing scans that will bless our families and future generations.


Wednesday, January 14, 2015

Tuesday, January 6th Last Sunset in Waikiki


I've tried not to be too boring with sunset photos. It was my favorite time to be on the beach. Often I would stop whatever I was doing at our room about 5:30 and grab my camera and scoot the two short blocks to the beach. Our hotel was behind the Hyatt Regency which is located at the point where Waikiki beach ends and Kuhio beach begins. I always thought of them as one continuous beach, and they are, but there is an artificial division there marked  a stone jetty that divides one beach from the other.  
 
My usual spot to wait for the sunset-the big angled rock


I liked to find a spot just below the jetty at the edge of the beach where there was a stone that was just right for sitting on. There I could sit and watch the sun go down along with all the other things that were happening in the water and on the beach at the same time. Behind me there was a raised grassy area used for sunbathing in the daytime and on Tuesday evenings as a stage for a live Hawaiian music program. On Tuesdays (this was a Tuesday) there was recorded Hawaiian music playing as the sun went down.

As the sun drops, more and more people line up on the jetty with cameras
Just below me was an eroded stone wall embedded in the beach, and my rock was level with an extensive concrete platform. In the beginning weeks I took photos of the wall. The first time there was a guy building a sand castle on top of the wall. The next few times There was even less sand around it and the tide was right so that the waves were splashing  up against it creating beautiful curtains of spray. The interesting thing on this last night was that the big windstorm the Friday before had resulted in most of the wall and all of the concrete platform being buried in sand. 


The Beach on Christmas day, taken from my seated viewpoint,  lots of concrete showing

Same view, after the storm, nothing but sand.

You can see my rock on top of the concrete ledge, upper left
 
Same view, last day


This night there were very few clouds so I hoped to see and record the green flash, but there was too much haze at the horizon, so it didn't happen. It was still beautiful and inspiring. I had time to listen to just a little of the music in the program that started at 6 pm before I headed back to the room for the last time.


Tuesday, January 13, 2015

January 6th Packing, Last time Snorkeling, Waikiki Beach

This was our last full day in Hawaii. I had a bunch of packing to do, but I wanted to make sure I did something fun on my last day too, so I planned to go snorkel at my spot on Kuhio beach. 

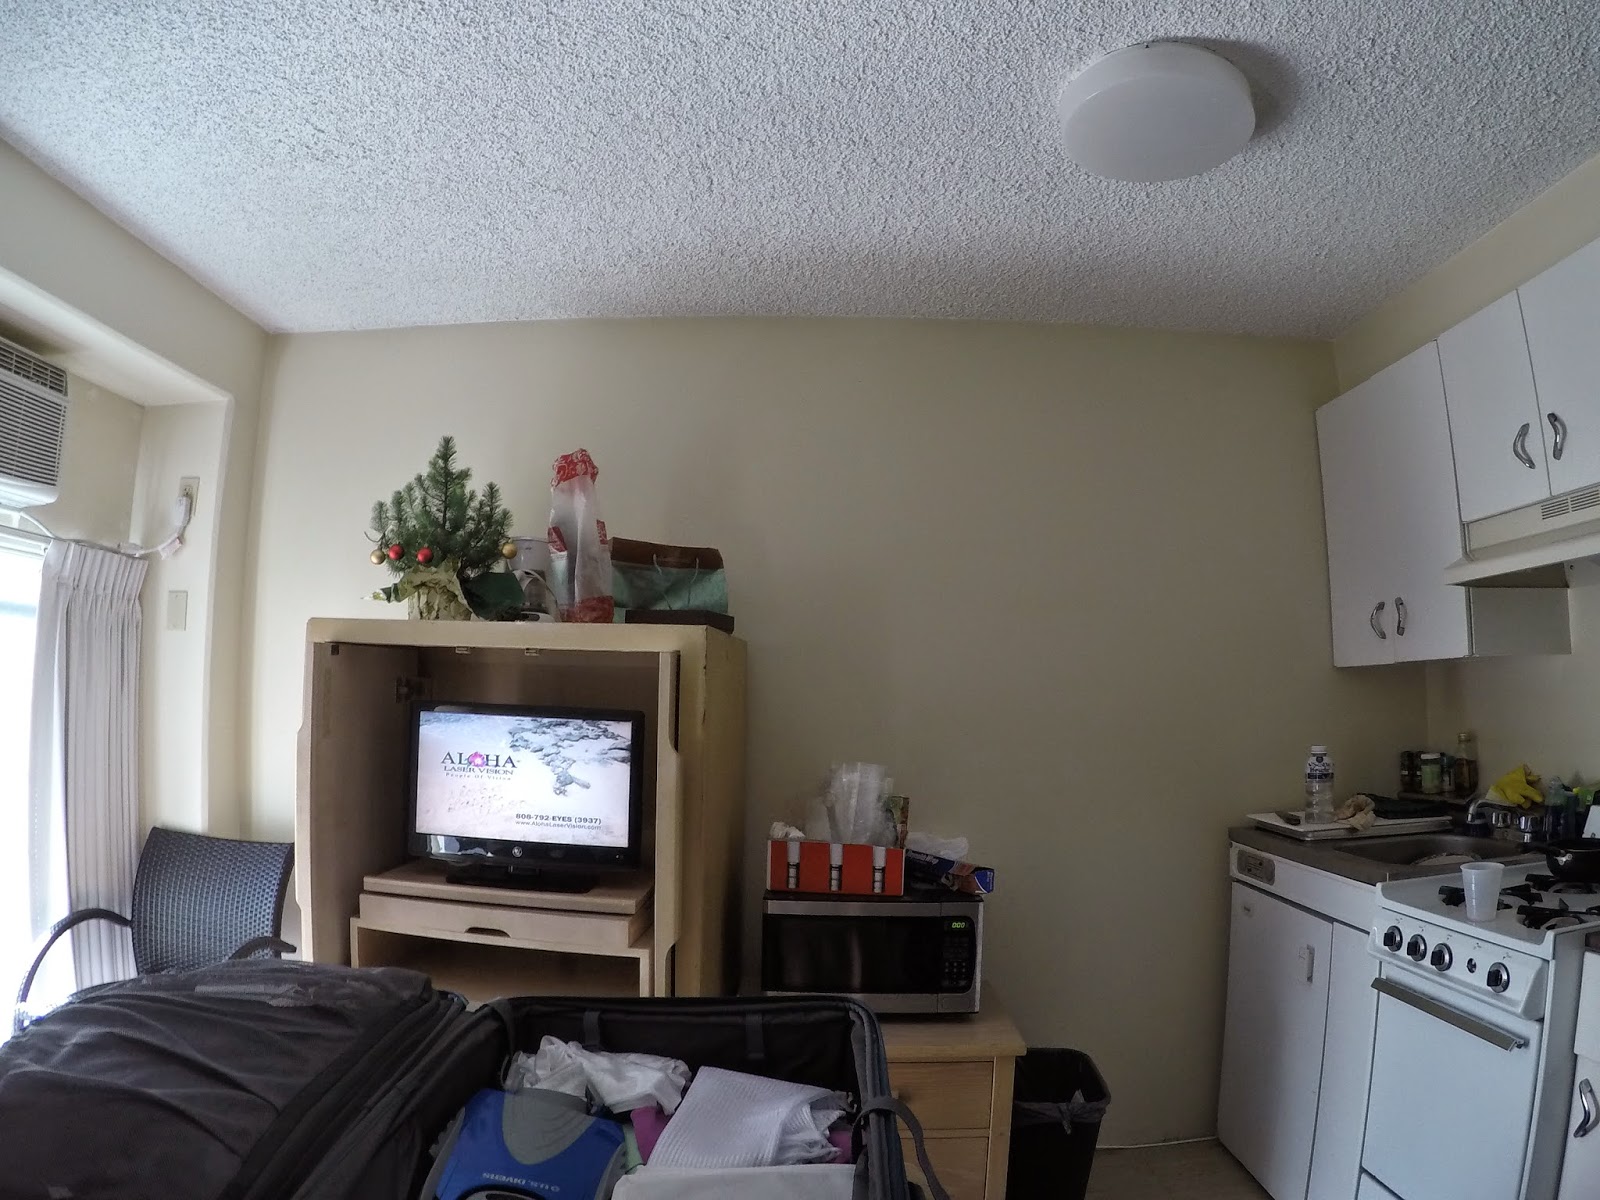
I thought I would try re-setting the Go Pro to medium frame instead of wide and try it out this time and see if the photos were closer to the close up views I get with the Fuji camera. To try the difference I took a couple of shots of our room. This was not the same room we started with. Since we needed so many weeks we had to change rooms twice. 

Go Pro set on Medium

Go Pro set on Wide

I got away with my snorkeling stuff about three in the afternoon and headed down the beach, savoring all the sights, sounds and scents as I went.

I got some good photos and decided not to use the Fuji. 

Raccoon Butterfly Fish, this one is cropped

A good shot of my favorite, The Lagoon Trigger fish Go Pro, not cropped

Shortjaw Bonefish, and Bluespine Unicorn fish cropped photo

Moorish Idol, Brown Surgeon fish

Saddle wrasse, goat fish and Bone fish

Back end of a Chinese Trumpet Fish

The same Trumpet fish, the only one like this I saw

Bluespotted Cornet fish. Patterns appeared when another Cornet fish showed up. Before that it was like the one in the next photo

Cornet Fish

Spotted Boxfish- my little friedn again!
When I was done in the water, I showered at the beach shower and relaxed in my beach chair, until five pm. I headed home hoping to get dressed and come down to the beach again for sunset.

Monday, January 5th Hanauma Bay Snorkeling

Hanauma Bay from the tram ride down


My time in Hawaii was almost done. It was Monday and we were scheduled to leave on Wednesday. I had always had a goal to go to Hanauma Bay to snorkel, but the one other time I tried to catch the bus to go there the bus passed us by, too full to pick anyone up and the next one was not due for an hour, so I gave up and went snorkeling at my good beach in Kapiolani park instead. I realized I needed to get an earlier start. The bus that didn't stop was the 10:30 bus. The earliest bus comes sometime after 8:00 when it starts its run.
 
Beachgoers returning up the ramp


Tram Ride down

 I got up meaning to catch that early bus, but found myself stalling and feeling nervous. That's been my pattern with snorkeling. I want to do it, I plan to do it, but I feel nervous about it and find myself dithering around creating little delays and thinking thoughts designed to create excuses not to do it. I had gotten comfortable enough with the Kuhio beach snorkeling location to not be nervous about snorkeling there, but Hanauma Bay was an unknown, so this unreasonable nervousness was surfacing again. What I had to tell myself was that:
1-It was closed the next day and we were leaving the day after that. I knew I'd be really sorry if I let nerves keep me from experiencing Hawaii's best snorkeling beach. 
2-When I'm scared to do something that lots and lots of other people do, I know my fear is unreasonable and that I need to push past the fear because it isn't a reasonable fear. Doing it anyway is the only way to overcome it.
3-I can identify reasonable fears and take steps to protect myself, as in wearing my life jacket in case I get into deeper water, and taking care to stay in the beginner snorkeling areas. 

I ended up going down to the bus stop at 9:30 instead of 8:00. The bus came within about 15 minutes and had plenty of room, plus there were a lot fewer people waiting to get on than the time before. I enjoyed the ride and seeing some new vistas and neighborhoods. The route goes around a big bay and along a cliff top with great views of the ocean, surf and surfers. 

From where the bus dropped us there was a little walk to the visitors center and the ticket booth. I passed vendors of snacks and tee shirts, and overlooks where others were snapping photos of the beach far below. 

The non-resident, non-military admission is $7.50. I looked through the gift shop and at some interpretive displays, and managed to miss my scheduled time to view the nine minute film required of all who go down to the beach. So I got into the next one and afterwards came out and got into a trolley. For $1.00 you can ride down. For $1.25 you can ride back up. For $2.00 you can ride up and down unlimited times. For me it was a no-brainer. My bruised heel bone is still tender enough that I save the pressure on the foot for any walking I can't avoid.

Expense wise, the lockers are what cost. They are behind the counter where you can rent snorkel gear so you have to get an employee to put your stuff in and out. small lockers are $8 and large ones are $10 and there is no guarantee there will be one available, so an alternate plan for valuables is important. The small lockers were gone so I had to spring for a large locker to keep my phone, money and bank card safe. One thing to remember if you go there is that you go to the return window to get access to your locker, so you don't have to wait in the purchase line which is always long and slow. 

With my valuables secured, I looked for a spot to settle. There was a section of lawn nearby that had some space and I thought it would be good to stay out of the deep sand so things would stay cleaner, so I set up there. It was right by the lifeguard station and I thought that would be more secure for my stuff that wasn't locked up, not that there was much there in danger of being stolen. I put on my water shoes and sprayed sunscreen on my arms and legs. I had sun screened my face and neck when I dressed. I went and showered at the nearby outdoor shower (it really was a great spot, near to everything) and gritted my teeth to let the cool water run all over me, not just get my hair wet, so I could get used to the water sooner. I like to get my hair wet with fresh water to get it out of the way of the mask so I don't have salt water stinging my eyes from dunking it in the ocean. The ocean is much warmer than it is at home, but it is cool enough to take a minute to get used to and causes me a gasp or two as I ease in to deeper water. However, by the time I'm past my waist, my legs are used to it, and by the time I push off and pick my feet up off the bottom and put my face mask into the water, I'm not uncomfortable at all. 

The nervousness I'd felt earlier had vanished as soon as I got off the bus and now I was just excited to get in the water. I didn't bring my Hanauma bay book, so I thought I was going in at the first entry point, but I actually missed that part entirely and went in at the second entry point.  As I waded past a little boy and his mom, they were exclaiming and pointing, and I looked down and saw fish that were at least a foot and a half long swimming around nearby. I was barely knee deep at that point, and thought, 'I need to get in this water as fast as I can!"

When I submerged my face and started floating, I was amazed at the large fish that were swimming around me. I was seeing big Ringtail Surgeon fish and black and yellow striped Sailfin Tangs. These fish are 1.5 to 2 feet long and almost as tall. I had no idea this type of fish were so large!

Ring Tail Surgeon Fish 1.5-2 feet

Sailfin Tang- 1.5-2 feet


My main thing when I snorkel is to take photos and videos. It isn't easy because I can't really see the screen, so I don't know whether the shot is framed or not. I was using my little Fuji underwater camera and had been disappointed the first time I snorkeled because I had thought I took lots of great photos, but only ended up with a few because I wasn't pressing the shutter release button hard enough. Since then I've been careful to push the shutter release really hard and have gotten good photos.  I chose not to bring the Go Pro because I hadn't tried changing the settings on it to get more close up photos and I knew I could get good shots with the Fuji. I also didn't want to carry two cameras or worry about one of them if I left it on the beach or to have to keep getting out to switch cameras. I want to be able to just get in the water and only get out when I need a rest. 


Threadfin Butterfly Fish        6-8 inches long


Orangespine Unicorn fish

Orangespine Unicorn fish tail streamers
After photographing for awhile, I moved close to a couple who were standing chest deep in the water near a large formation of fossil coral. They told me there was a big eel, so I put my face in and found a full size spotted 'White Mouth Moray' eel hanging about 5 inches out of the rock with its mouth open. I popped my head up with a gasp, and quickly tried to get a photo, but the eel retreated before I could. After that I hung in the water trying to be there to take a photo of the eel when it came out again, but it didn't. I went off for 15 or 20 minutes looking at other stuff and then came back around looking for the spot again. Meanwhile my camera had gone to sleep and turned off. So when I spotted the place and the eel was hanging out almost two feet! I fumbled with the on switch and actually turned it on then off again, and while I tried to turn it on again and was waiting for it to be ready to take a photo, the eel flowed all the way out of its spot in the coral formation and swam away, turning the corner and going out of sight in the rocks and coral. It was just like a nature show shot, and I was so glad I saw it, I just wished I'd gotten video of it!
Bluestripe Snapper 1-1.5 feet


Bird Wrasse  6-8 inches  Colors-Indigo, Teal, Green

Cauliflower Coral with surprise nearby resident-I didn't notice it when I took the photos...
 I came around a corner of rock and coral and suddenly the biggest fish yet came up right in front of me. I identified it immediately as a parrot fish because of the mouth shape. I had enough presence of mind to snap a couple of photos and then started a video, all in just a few seconds. This fish was at least five feet long, maybe more and at least 2 feet tall, maybe more.  After I started the video, trying to swim a little closer, it took off and moved so fast it was soon out of sight. There was no hope of my being able to catch up with it, so I just collected my dropped jaw off the ocean bottom and moved on. (I actually was vocalizing 'oh my...' into my tube when it appeared. 


Ember Parrot Fish, Nearby fish are 1.5 feet and 1 foot long, estimate Parrot fish is 5-7 feet long...

After spending about two hours in the water I came out, a little chilled, a little hungry and thirsty. Breathing through a tube in a salt water environment leaves me with a dry, salty mouth. When my tongue sticks against the roof of my mouth, I know it's time to get out and get a drink. For some reason snorkeling makes me really thirsty anyway. I went to my little spot and had some nuts and Clementine oranges and some water, and rested and let the sun warm me up some. 


When I'd rested for half an hour I went back into the water for another hour. 

Rock Boring Urchin


Orange Band Surgeon Fish


humuhumu-nukunuku-a-pua-a  Wedgetail Trigger Fish Hawaii state fish

Christmas Wrasse


Palenose Parrotfish

Palenose Parrotfish

Lagoon Triggerfish


It's hard to decide when to be done and go home in a setting like that. People are arriving and leaving all day long. I just finally got tired and was in an area where I wasn't seeing a lot of fish, and decided to go. It's always interesting how the shower that made me gasp and flinch feels warm and comfortable at the end of being in the water for hours. Drying off and getting dressed in the nearby bathroom/dressing room felt good. As I sat in the tram getting ready to go up, I felt so relaxed and comfortable. 

It turned out there were whales spouting and surfacing just outside the bay, so I sat and watched them while waiting. I'd had a little time at the interpretive booth and started watching them there while looking at the species photos at the booth. If I'd had my good camera with the telephoto lens, I would have tried to get some shots of that. 
The first entry point. I want to go back and explore that area

Second entry point where I started

The Beach

limbs down from Friday's windstorm

I got another fish identification book at the gift shop and went to the bus stop, where the bus showed up after 15 or 20 minutes, looked at us and never opened its doors, but just drove away. Apparently it was full. We found out from the next bus, which was going the wrong way, that he had called for another bus to come off schedule to pick up the slack. A van came, offering rides for $5 but I had a transfer slip from the ride there that covered my return, so I was willing to wait. $2.50 round trip trumps $5 one way. Sure enough, in another 10-15 minutes another bus came going back to Waikiki and I was home before 5 pm, and got there soon after Harry did, so the timing was good.